Just Plain Living…

Stories from our gentle Home…

Pumpkin Cream Cheese Chocolate Chip Muffins October 10, 2019

Filed under: Uncategorized — justplainlivin @ 9:29 pm
Tags: , ,

Pumpkin Cream Cheese Chocolate Chip Muffins

Yield: 12 muffins (This recipe doubles easily if you want more)

By Carey Jackson

799DDF64-944C-489A-BEEA-30261E18FEC7

Muffin Ingredients:

Dry

  • 1 3/4 cups all-purpose flour
  • 1 tsp baking soda
  • 1/4 tsp salt
  • 3 tsp pumpkin pie spice
  • 1/2 cup light brown sugar
  • 1/4 cup sugar (plus 2 extra tbsp to sprinkle on top)

Wet

  • 7.5 oz. canned pure pumpkin (this is half of a 15 oz. can)
  • 1/2 cup vegetable oil
  • 2 eggs
  • 1 tsp pure vanilla extract

To add once dry and wet are combined:

  • 1 cup chocolate chips (plus a few more to sprinkle on top)

Cream Cheese Topping Ingredients:

  • 8 oz. cream cheese, chilled
  • 1/4 cup sugar
  • 1 egg
  • 1 tbsp milk 
  • 1 tsp pure vanilla extract

How to make:

  • In a large bowl, stir the dry “Muffin” ingredients with a wooden spoon until combined.
  • In a separate medium bowl using a hand held mixer or stand mixer (I prefer the paddle attachment), combine the “wet” muffin ingredients and mix on low/medium until combined (this only takes 30 seconds to a minute—do not over mix). *You can also mix anything in this recipe by hand with a silicone spatula if you do not have an electric mixer, just be sure to mix well.
  • Using a silicone spatula, add the combined “Wet” muffin ingredients to the “Dry” muffin ingredients being sure to scrape the wet ingredients bowl. All muffin ingredients should now be in the same bowl, with the exception of the chocolate chips; you will add those last. Using a hand-held or stand mixer (with the paddle attachment) combine the wet and dry ingredients until they are completely mixed together (this takes less than a minute—do not over mix). Add the chocolate chips and mix them in thoroughly using a wooden spoon or silicone spatula. Set this bowl aside.
  • In a medium bowl, add all of the “Cream Cheese Topping” ingredients and mix until combined. It is easiest if you use a hand-held or stand mixer but only mix until combined (30 seconds or so) and place this bowl in your freezer for 15-20 minutes to re-chill it. It is important the mixture is very cold (but not frozen) so it will “scoop” and somewhat hold shape. When you remove it from the freezer, scrape the sides of the bowl and stir the cream cheese mixture with a spatula to even out any cold spots around the sides of the bowl.
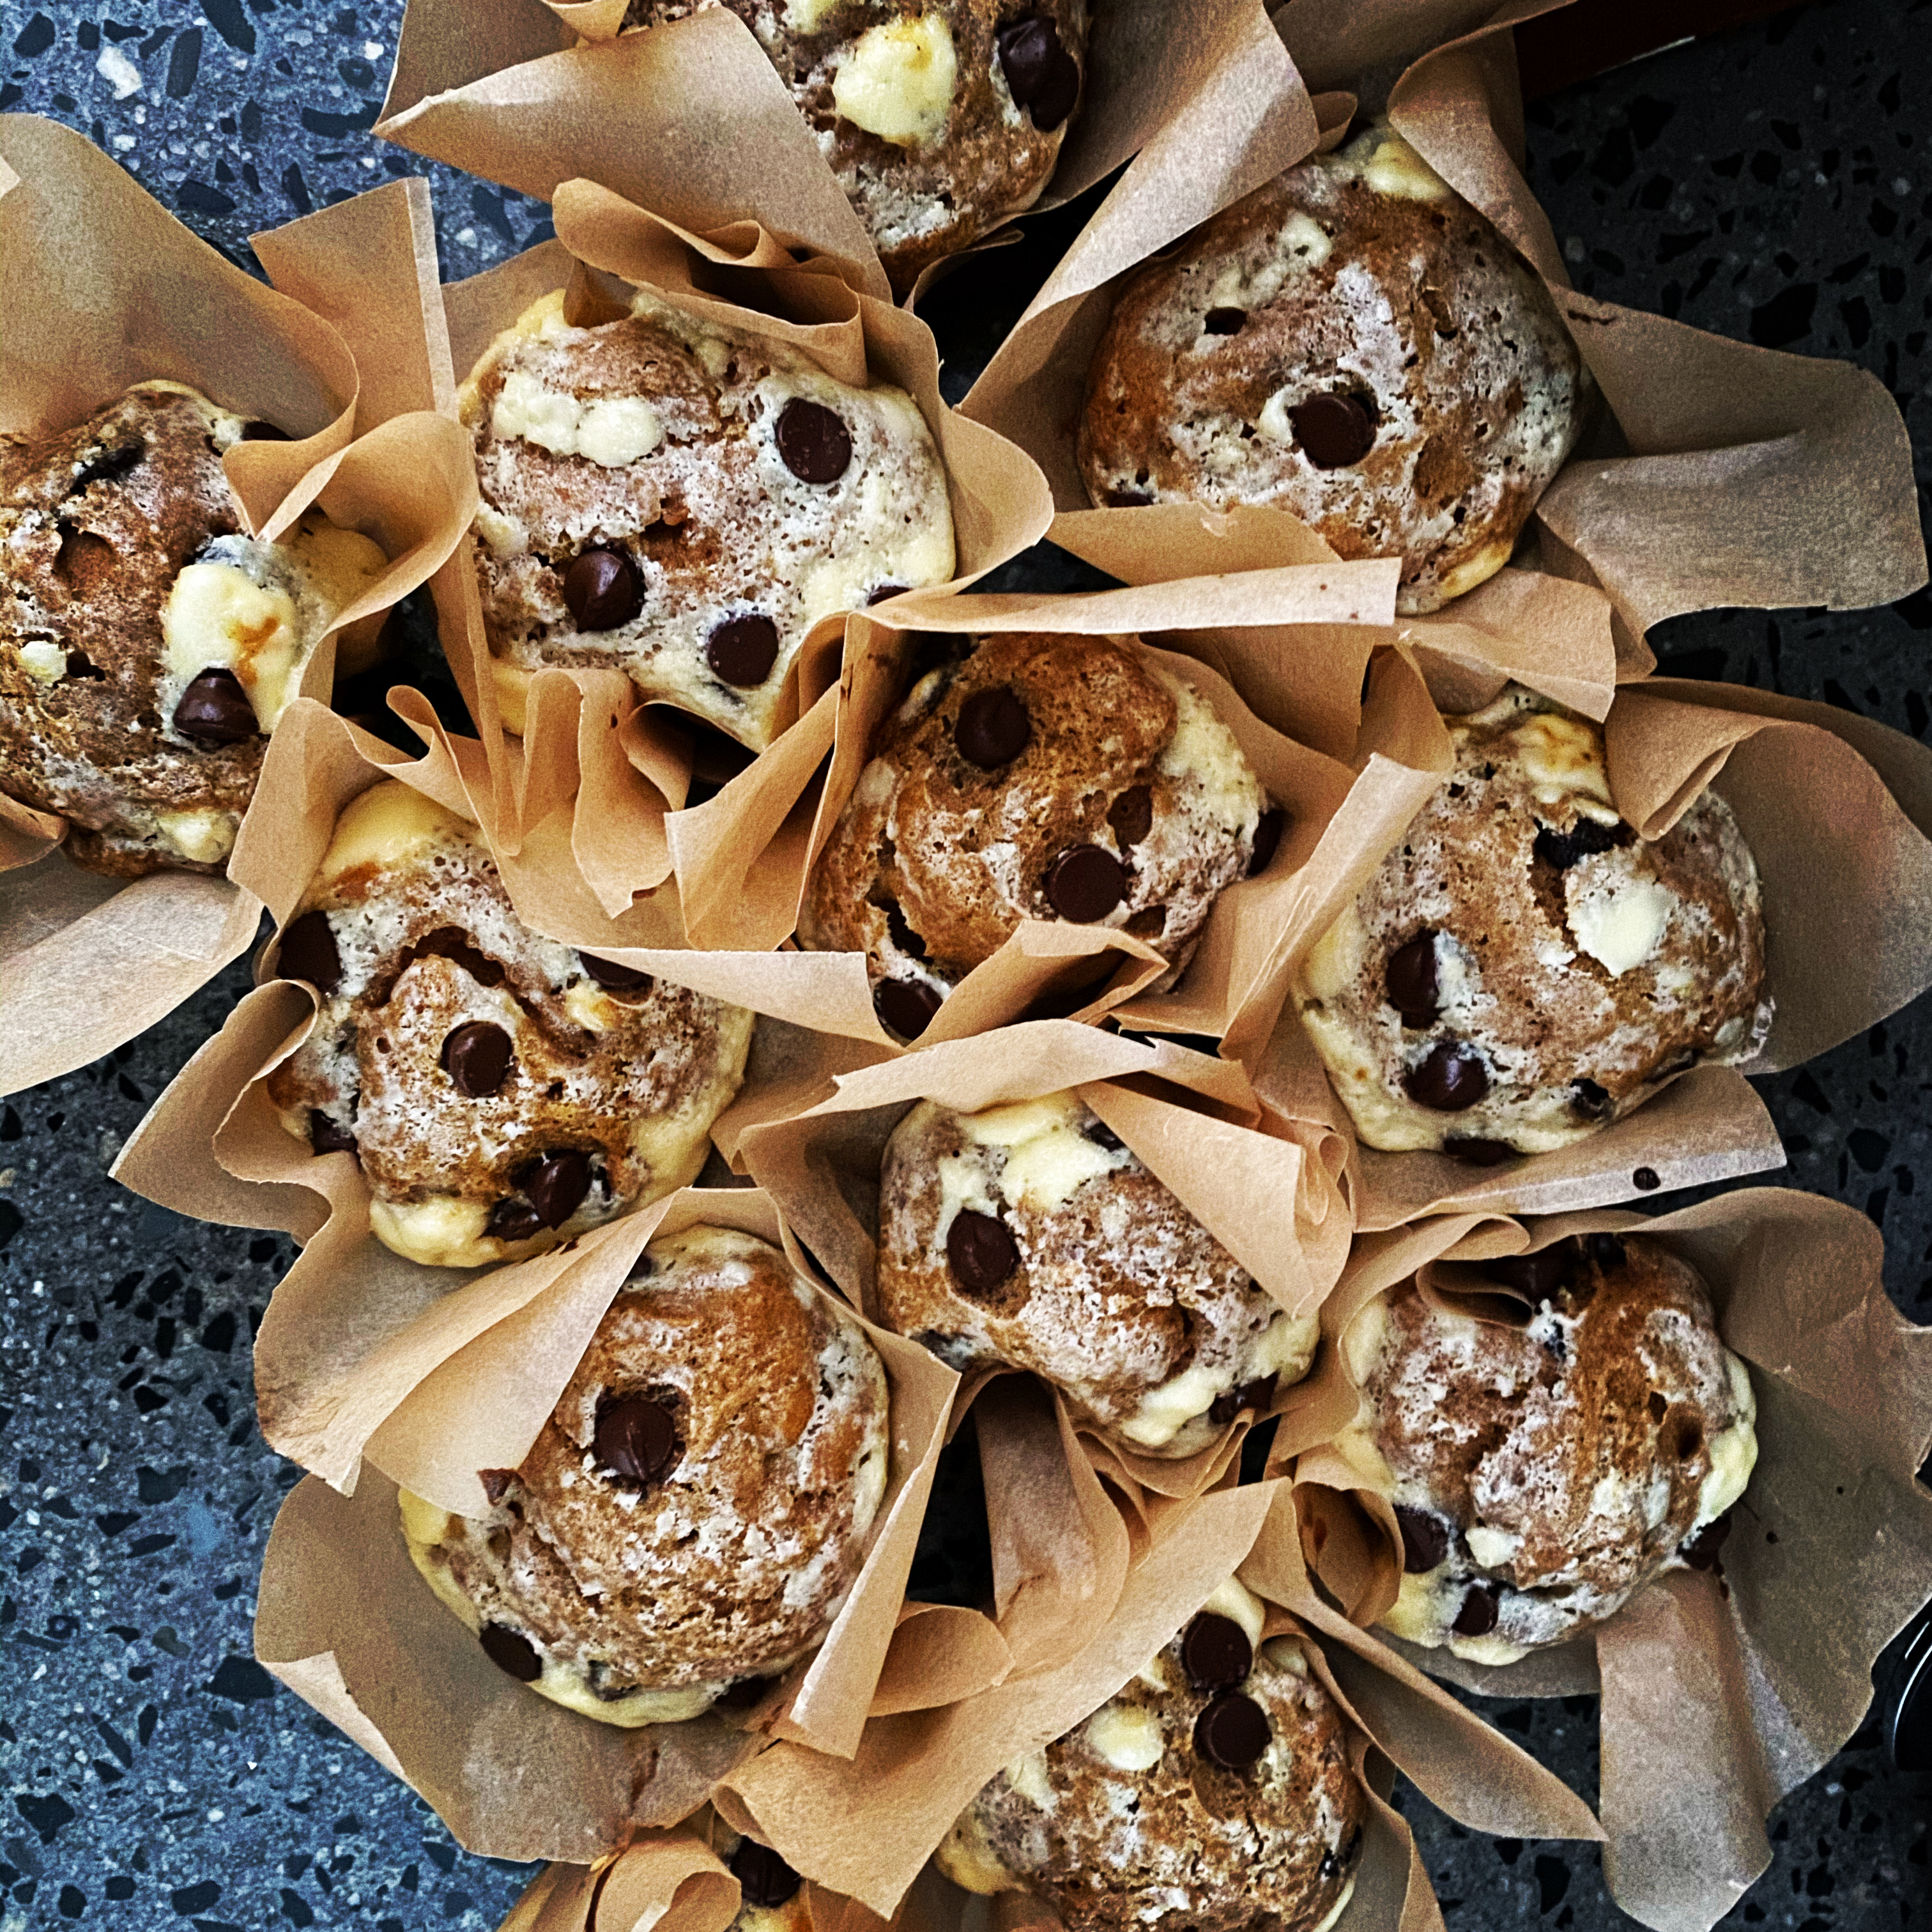
  • While the cream cheese topping is in the freezer, pre-heat oven to 350and prepare your muffin pan. Here are a couple of options: If you are using a regular 12 cavity muffin pan, these muffins look really nice in hand-cut parchment liners. To make these, cut parchment paper rectangles approx 7” by 8”. The best way to get these in the cavity is to first fold each one in half length and width wise and then again corner to corner so when you unfold it you see an asterisk. If this is the method you use, you will not need to spray the pan. You will need to put each liner in and hold it in place while you fill it. It is a bit more time consuming, but it looks beautiful (the muffins shown in my photo are in my handmade liners)! You can also buy pre-made versions of these here. If you use regular muffin pan liners, lightly spray the top of the pan so that the tops don’t stick when they are finished. What I like about the parchment liners is that you can over fill the cavity a bit with the cream cheese and it won’t spill over when cooking because they are so tall. You can also skip the muffin tin and use pre-formed, decorative paper muffin cups that are tall and place them directly on a cookie sheet to bake.
  • To fill the cups, use a large (usually about 4.6 tbsp) cookie dough/muffin scoop and put one scoop of the pumpkin mixture into each cavity (follow the instructions above if using hand-cut parchment paper liners). Use your judgement with the quantity of pumpkin mixture in each cavity (you might need 2 scoops depending on the size of your cups); it should be 3/4 of the way full to leave some space for the cream cheese mixture. Use a small (usually about 1.6 tbsp) cookie dough/muffin scoop and put one (or 2 if you want and have room) heaping scoop of the cream cheese mixture on top of the pumpkin mixture in each cup.
  • Once all of the cups have the pumpkin mixture with the cream cheese mixture scooped on top, take a butter knife (or anything dull) and lightly swirl the cream cheese mixture over the top of the pumpkin mixture with one pass of the knife (you are just giving the things you are sprinkling on top a more level surface to land on). Sprinkle the top of each with 5-6 chocolate chips and then with a pinch (use as much or little as you like) of sugar.
  • Place the pan in the oven and bake at 350for 25-28 minutes (or until a toothpick inserted into the middle of a muffin comes out clean).
  • Once you remove the muffins, let them rest for two minutes and then move them to a cooling rack so they do not continue to cook in the pan. Leave them on the cooling rack until they are completely cool.
 

Michaelmas in our Waldorf Home October 10, 2009

Michaelmas 09 007

For our family Michaelmas is a season. We celebrate many festivals throughout the year in our home but when we celebrate Michaelmas, it signals the beginning of the time when we look within ourselves more deeply, the time when the darkness of winter sets in. St. Michael is the patron saint of the sea and maritime lands, of ships and boatmen. St. Michael’s story can be complicated and is not easily understood by younger children. We are not a Christian family so reading about St. Michael from that perspective is not the way we choose to celebrate this time. Instead, we briefly talk about that story and regard Michael as “Michael the Victorious” and still use his name to learn and celebrate as many Waldorf  (Rudolf Steiner) followers do.

This year we took the entire week to focus on the story of St. George and the Dragon. This story goes nicely with this week  because it also has the good versus evil theme.  St. George who is good, fights the dragon who is evil.  In her book, “A Journey Through Waldorf Homeschooling (Kindergarten)”, Melisa Nielsen says that this festival has great significance especially for young children still battling their inner will. The battle of good versus evil is one they know well! She also says that older children also often see the battle (from the book), mirroring battles that could be going on around them and their “need” as children to try to understand it all.

We read, drew, baked dragon bread, reinacted the story and had a fun time. Here are the photos, please refer to my bread making entry for a great bread recipe that can be used to bake the dragon bread. Just shape it like a dragon and bake it until it appears done!


001002


007

Michaelmas 09 001           Michaelmas 09 002

Michaelmas 09 005


Michaelmas 09 008Michaelmas 09 009


Kissing Summer Goodbye… September 24, 2009

photo

Long Days. Warmth. Light.  It is fading fast. Although the fall has already begun, it still feels a bit like summer. Underneath it though, I feel the strong pull of the darkness. The time to go to the light within. IT is calling in a whisper as it does this time of year. IT is giving cooler nights and wind in the trees. IT is signaling to the animals to prepare…and IT is just beginning to paint the trees. On my silent walk this morning, IT told me to give my kids one more day out in the water…one more day at the lake before the kiss goodbye.  

Reluctantly, I gave in. You see, once we actually start back to school, I get in a pretty solid rhythm. This is a part of every fall for our family-even though we school at home. Not that we ever really get too busy…but, the lazy days of summer slowly transition to the productive days of the fall. When watching the animals, you can see them do this as well. They are so busy-and full of intention, preparing for the season of cold. It is really beautiful to watch. To imitate. And we all imitate it…whether or not we are aware of it…or present for it.

What I love the most is how summer flows…we are busy when it begins, finishing up school, etc…and then we get into this wonderful S-L-O-W groove…then, almost without even noticing, the Harvest time arrives. This creates a smooth transition for us.  We are busy with the Harvest and do not have all of the time-like in mid-summer-to really notice the change. And then Viola! Summer is just a memory. No time to mourn the loss. It is just gone and we must move forward.  

So I am writing in praise of the gift that the summer gave to us this year…and it is the last kiss goodbye to the warmth….we are so blessed…

Last Hurah! 020

                       Give Thanks.Last Hurah! 093 


Last Hurah! 063

Last Hurah! 105

Last Hurah! 092


Last Hurah! 054

Last Hurah! 089

Last Hurah! 084 


I love this…it is from

A Child’s Seasonal Treasury

by Betty Jones:

Brother Wind howls, blowing the leaves from the trees. Father Sun’s warmth and light are subsiding. The world appears to be slipping into the cold promise of winter, and all prepare for the darkness that enfolds the world.  Yet inside each of us sparks the light and warmth of the human spirit. We kindle our light within as winter approaches.


Last Hurah! 029


A Waldorf Transition to Fall September 23, 2009

Fall Begins 023

           Today marks the beginning of Autumn. I went for a long long walk this morning and made several observations  in nature that reflect this beginning. One thing I noticed more than anything else…the Milkweed is releasing her “seed babies”-as I call them. They were flying through the air having a grand time today as I walked up and down the mountains. “Weeeee!” they say as they float along, searching for a place to settle down for the season of rest. Of course with the  turning of the season I had to pull out one of my favorite books to read to Taige…

Fall Begins 120

The Story of the Root Children by Sibylle Von Olfers,(a beautiful German author, artist and Nun who lived her life long ago). The story is pure and the illustrations are lovely. I have collected all of her books and truly love them.  They are available here.

Along with reading this beautiful story, I made some changes to our nature table. Last year, I made (needle felted) the fall version of Mother Nature. She always reigns over our nature table (and in the winter when she is resting, King Winter and Mrs. Thaw take her place). I have a different version of her for each season. For fall, she is in warm colors and has a harvest basket in hand (and she has dreads…don’t know what that is about, must have been my mood!).

Fall Begins 129

The entire nature table was cleaned and resituated to reflect this time of year. I have made several needle felted pumpkins as have added some beautiful gourds that were found in a friend’s garden a few weeks ago. I spotted some Chinese Lantern flowers on a walk last week and they are in a corner of the table drying.  Pine cones and acorns, seed pods and fall leaves all now adorn our table.

Here are the pictures…Fall Begins 121Fall Begins 123


Fall Begins 126


I lit some candles and we had a few moments of singing verses and bidding summer goodbye…My home felt pretty (it told me so) and I decided to capture a few photos…

Fall Begins 025Fall Begins 028Fall Begins 026Fall Begins 027

I have memorized this verse (for our morning reverence) for this week it is a beauty…

Yellow the bracken

Golden the sheaves

Rosy the apples

Crimson the leaves

Mist on the hillside

Clouds grey and white

Autumn Good Morning

Summer Good Night!

And, here is a lovely little finger play from the book A Child’s Seasonal Treasury:

Autumn Leaves

The trees are saying, “Goodbye” to their leaves (stretch out arms and wave goodbye)

As they flutter and float and fly in the breeze (flutter fingers)

All golden, orange, and red, they sink softly off to bed. (Slowly bring fluttering fingers down to floor)

On Mother Earth’s breast rests each leafy head.  (Make sleeping gesture with palms together; give a big, restful sigh).


Farewell Summer…until next year.


Elderberry Syrup September 19, 2009

Some people run straight to the doctor when feeling ill. I run into the forest. Gather. Return home.  Make magic.  Today was filled with Kitchen Witchery. Me, in the kitchen…preparing medicine for the winter. It just so happens that Taige was not feeling so well today…at all this week for that matter. I decided upon Elderberry Syrup because it is so yummy and my kids take it easily. This tree has been called “the medicine chest of the common people” because the flowers, leaves, berries, bark, and roots all have been used in traditional folk medicine for centuries. Elder flowers and berries are antiviral and immune-stimulating. There is also a lovely story about “Elda” in one of my herbals and my kids love to hear it over and over.

Our day in photos…as well as the directions for making Elderberry Syrup:

Elderberry Syrup 004

Loading the dehydrator with another batch of applesauce…

Elderberry Syrup 003

Elderberry Syrup 002

The first batch of applesauce fruit leathers turned out beautifully! These are pure…and my kids love them.

Elderberry Syrup 013

My Herbal Formulas…(maybe a real book one day…)


Elderberry Syrup 008

 This is my SUPER Immune Formula tincture…it is a vital part of the Elderberry Syrup…like most medicine-makers, I have odd jars of tinctures in dark corners of my home…this one is intense as it has a menstruum of Everclear. It will never go “bad”. I often gift this tincture to friends and family who are in need. Alone, it is an amazing immune booster both for prevention and in acute situations. I mix one ounce of this tincture in with my Elderberry Syrup for these reasons as well as to preserve the syrup.

Elderberry Syrup 018       For today since I was in need of Elder and I needed it right away, I made a stop at the FBFCElderberry Syrup 015  Ahhh, Elderberries

Local honeyElderberry Syrup 014

Herbs galore…I love this room.Elderberry Syrup 016


Elderberry Syrup 038Elderberry Syrup 028


Photos of ginger (both whole and then grated -yes…I made that bowl, and I love it…)


To make Elderberry Syrup, you will need these ingredients:

3 cups fresh Elderberries or 1 cup dried, 3 cups filtered water, 1 ounce of fresh grated ginger, 1 cup of local (to you) honey, the juice of 1 lime and 1 ounce of Echinacea tincture (ideally pick this up from a local herbalist…if not, Gaia Herbs makes a nice product).

Just simmer the Elderberries and ginger in the 3 cups of water until the liquid is reduced by half (an hour or so)…if you do not stir it while it is simmering, you will see the original water ring on the pot and can easily tell when it is halfway. Strain it well. Let it sit in the strainer over a glass bowl for a while, really working the juice out of the cooked berries. I have a wonderful strainer that is perfect for straining herbs…here it is:

Elderberry Syrup 071

After you have the medicine out of the berries, compost them. Add the juice of 1 lime (you must strain this too):

Elderberry Syrup 072Add the honey and stir…and you should be left with this:

Elderberry Syrup 073 Let it cool completely and add the tincture. Stir well and sterilize a glass bottle (I do this in boiling water),  fill it with the syrup and refrigerate (it will keep for a year). Now, I sometimes sell this magic potion so I have a nifty label as well as a little herbal business ‘ApotheCareys’…so,  I label it and date it.  And it looks so beautiful and simple…

Elderberry Syrup 077

Elderberry Syrup 074

The dosage is not tricky but, that you will have to look up. I am an herbalist…not a doctor…and I do not prescribe! 

And last but definitely not least…my Spiritual Syllabus books came today. These go along with Kindergarten and they are just amazing. Lono and Coco Boato is the autumn book and we will begin on Monday!

Elderberry Syrup 060

Now, if I can just get Taige feeling better..


Preserving the Harvest September 17, 2009

Apples! Sept 2009 027

Apples! Sept 2009 024


    The Harvest is here! I can not  believe the Earth  is already beginning the tilt into the Fall. Summer has flown by and I have been a bit lazy with my blogging habits. This is because summer is the time for discovering  beauty and awe in each other, in ourselves, and in the fascinating world around us….no time to blog!  As the sun wraps its warm arms about us, we celebrate with a delightful combination of revelry and reverence for all that is, for all that we are (thanks to Jubilee! for that). We have mad many amazing moments of wonder in the past few months and I send out gratitude from my heart for the memories. With Mabon approaching on the 22nd, I feel it necessary to post about storing up for the winter. When I stop and stare out the window, or when I am sitting in the woods…JUST watching…(sometimes for a bit too long!), I am starting to see that nature is getting ready too. Mother Earth is silently calling, signaling for us to get ready, winter is coming. Well, I love winter. It is my favorite season…so naturally, I hear her call and am working diligently to preserve the harvest to ensure plenty of hibernating time in the midst of winter. OK, I am starting to dream of winter a bit too much now…it will be here soon enough I suppose.  Must get through fall first.

Last week we went apple picking. We picked a bushel and a half…roughly 60 pounds of apples. I had planned to preserve all of them in different ways. We made and canned applesauce, apple pie filling , apple butter and dried as many slices as would fit in the dehydrator.  The aroma in the house is amazing right now. Here are some of the highlights:

Apples! Sept 2009 004Apples! Sept 2009 057


Apples! Sept 2009 039


Apples! Sept 2009 010

Making things with Apples! 003

Making things with Apples! 004 Making things with Apples! 007 Making things with Apples! 008 Making things with Apples! 013 Making things with Apples! 014 Making things with Apples! 021 Making things with Apples! 024

Making things with Apples! 018

       Making things with Apples! 020

And the tree was happy.


The Story of Stuff with Annie Leonard August 19, 2009

On the idea of simple living and WAY beyond…I must share this! I could go on and on and on and on about the genius behind this movie…but instead you watch and decide for yourself. Enough said. I am feeling so grateful to have this sent to me (by my Mom!) and it falls in perfectly with what Haley (our oldest) is learning in this week’s lesson of homeschool history: “The Information Age” (specifically the parts on advertising and TV watching!).

Vodpod videos no longer available.

more about “The Story of Stuff with Annie Leonard“, posted with vodpod


Here is a link to all of the copyright information (Even this is genius!):

http://creativecommons.org/licenses/by-nc-nd/3.0/


Lavender Lemonade July 4, 2009

Yum. Lavender. Lavandula Angustifolia. It is one of my favorite plants. Not just because of it’s beauty or scent…but because it is one of those herbs that works for almost everything.  Did you know that in WWI,  the essential oil was used to disinfect the floors and walls of the hospitals!?  It is also anti-inflammatory and antiseptic. In our home, lavender is good for any boo-boo or bad mood, bug bite or bath soak…but it doesn’t stop there. At the height of summer, there is nothing more refreshing than an ice cold glass of Lavender Lemonade.  In years past (before my big kids got so big), we had an old window-you know…one with really beautiful glass and chipping (lead) paint…I painted the reverse side of the glass with the words “Lavender Lemonade” and that was their “sign”-for the lemonade stand. They would set up at the end of the driveway and would sell out within an hour or two. Yesterday, the kids and I made a batch and it reminded me that I should share this recipe…it is just too delicious to keep to myself!

July 2009 027

Lavender Lemonade

Ingredients:

Lots of lemons (20 or 25)

Lots of Sugar (get a big bag)

Lavender Flowers (2-3T)

Good clean water

First, you will make the “concentrate”. Do this by putting a half gallon of filtered water to boil. Remove it from the heat and add 2-3 tablespoons of Lavender flowers (I like dried). Put the lid on the pan and let it sit for 20 minutes. Next, juice the lemons until you have about a liter of lemon juice…(this takes a lot of lemons-probably 20!).  Then, strain the lavender flowers out of the water and compost them. Combine the lavender water and lemon juice (this is your concentrate). Now…from here it is all about your taste preference…how tart do you like it…how sweet do you like it?  I like to add the sugar (because I only use real sugar-that other stuff will kill you!) when it is still warm…so, go ahead and add…but…do it a little bit at a time…and remember, you still have to add water to the mix. What I do is get out my 2 quart pitcher, fill it about halfway with the concentrate…then add about a half a cup of sugar…fill it up with water…stir well and taste. If it is not sweet enough, I add more sugar…or if it is not strong enough, I add a bit more concentrate. You must decide for yourself! I store the rest of the concentrate in the fridge until I am ready to mix it. Whatever way you do it…be sure to have fun…!

July 2009 028July 2009 030July 2009 029


The Sacred Duty of Homemade Bread May 28, 2009

Late May 09 036

Yum. I can still smell the aroma from the Sunflower Oatmeal bread we baked last night. We make a batch of bread at least once a week. It is part of our school “work”-and it is my belief that the process of baking bread is as nourishing to the soul as eating it is for your body. I am going to share the recipe below. Although this particular bread did not come from a book, if you are new to bread making, I recommend this great book called “Whole Foods for Whole People”. It teaches the process in a gentle way.  I do not use the book so much for the recipes anymore (they are in my brain) but, I completely love to read and re-read the the text portions, focused on nutrition and menu planning. And I LOVE love love the simple art work on the cover and inside. This is one (of many) that I consider to be a  ‘must have’  on your shelf. Here is a quick excerpt… (now, before you read…PLEASE know that this is a tiny bit old-fashioned…considering that it only mentions bread making as a sacred duty for females…I strongly disagree with this…in a non-feminist way-if that is possible. Simply put…my belief is that it is a sacred duty for all PEOPLE. So, here it is…of course I am typing it like it is in the book…just substitute for yourself to keep happy)…

“It is a sacred duty for every girl and woman to learn to make good, light bread from unrefined flour. Mothers should take their daughters into the kitchen with them, when very young, and teach them the art of cooking. She should instruct them patiently, lovingly, and make the work as agreeable as she can, by her cheerful countenance and encouraging words. If a love for cooking and other necessary domestic duties is once implanted, it will never be lost! It will also prove a real safeguard from idle moments during the restless teens and will help prepare a young woman for a happy home of her own. Today much worthless information is passed on to youth in the name of “education”, while the earnest duties of life are passed over, with hardly a mention. Good cooking is one of the most essential branches of education, especially for young women”

Late May 09 038

I think the second to last sentence there might just be why we homeschool!! Ok…I am a bit pressed for time this morning so instead of my usual rambling, I am going to post the recipe and get outside…we have sunny skies this morning and our bodies are in much need of moving in the light! Feel free to post a question, I will answer as quickly as I can.

Late May 09 040

 Ingredients: (you will also need a good cooking thermometer and a flour sifter- I think these are the only two things that might not by lying around)

1 1/2 T dry yeast

1 Cup warm water (my yeast packets suggest “warm” to be 110-115 degrees Fahrenheit-if you are dissolving the yeast in the water like in this recipe-work fast to get the yeast in the water and keep it in a warm place so it holds the temperature for a bit.)

1 T honey (please use your local honey-more on that topic another day!)

1 stick of room temperature butter (do not melt it…just leave it out for a bit before you begin making it-or give it to your toddler to “play with” for a bit…it’ll warm right up)

3-4 T honey (Plus a little more to brush on top at the end)

1 T salt (Celtic sea salt is my favorite…)

3 cups warm milk (or water) (either one you choose, stick to the same temperature “rules” that you did for dissolving the yeast-I have ruined one too many loaves of bread by killing the yeast (too hot) or not growing the yeast (too cool).

4-5 Cups Spelt Flour (you will need 5 cups -maybe more- but, leave one of the cups aside)

4-5 Cups Whole Wheat Flour (you will need 5 cups -maybe more-but, leave one of the cups aside)

Sunflower seeds (about 1 cup plus a little more for the top)

Oatmeal (Quaker is fine-I like whole oats in bread-makes it more crunchy)( 1/2 to 1 cup…plus a little more for the top)

 Preheat the oven to 350 degrees. Stir the 1T of honey in the cup of warm water. Then, pour the yeast in. Don’t stir it (tempting, I know). Set it aside for 10 minutes in a warm place and let it get foamy. Meanwhile, put the butter, the rest of the honey and salt in a large (save yourself time now…go for the big one) bowl. Warm the milk (or water) and pour it over the ingredients in the bowl. Add the yeast mixture. Add the 4 cups of Spelt flour and the 4 cups of Whole Wheat flour and the oatmeal and sunflower seeds. Stir it with a wooden spoon or you can mix it with your hands. Just combine the ingredients for now…don’t over work it.  Cover the bowl with a cloth and place it in a warm place to rise for 10-15 minutes.  Once this time has passed, uncover it and add the remainder of the flours (1 cup of each) and flour the counter top and your hands well. Your dough needs to be “knead-able”-if it is too sticky, add more flour-just keep the balance of the two flours). This is where the recipe literally needs your intuition…you must just “know” when the dough is the right consistency and texture…you cannot take out flour once you add it…so, a just add a little at a time. Once it is workable, knead it for 5-10 minutes until it is smooth and elastic-not too sticky.  Divide the dough in half- (I think next time I will divide it into thirds so my cooking time is shorter). Grease whatever you are cooking it in well. Once it is ready to bake, brush the top with honey and sprinkle it with oats and sunflower seeds. Cook one pan at a time-the rest can just sit on the counter and rise some more.

A couple of options…you can make rolls or loaves or whatever! I can not give you an exact cooking time…I use stoneware to bake in-so, my cooking time is always longer (50 minutes or so for a loaf-half of the dough). Rolls cook nicely in about 18-20 minutes. Really- bread is a lot intuition. Don’t assume your bread is cooked through in the beginning…cut into it and see if it is “doughy”-it is a real learning process and it will take a few times to get it down. Once you “get it”, you will not forget it! Write it down each time and make note of what you did differently and what worked or didn’t. I am constantly making changes in my recipe!  I have no idea where this particular recipe came from…but I have it written down and would give credit if I could! I will say that I have altered it a bit and tweaked it so that it works for me…it was one of the first recipes I tried it was way too vague for me and I messed it up a bunch of times before I got it right!

Off to soak up the sun…Peace!


Bloodroot Blooms April 12, 2009

Filed under: Uncategorized — justplainlivin @ 2:55 am

The weather in the mountains of North Carolina in early spring is quite inconsistent…that is about all I can say for sure. One day it is quite warm. Sunny. Warm. Then, in the blink of an eye…windy…cold…snow. Cold. Snow. The past 3 days have been filled with thunderstorms. Thunder. Lightning. There is nothing like a thunderstorm in the mountains. When the thunder makes its sound…which is amazing if you think about it…the echo then repeats it…louder and louder and on and on. Truly, it is amazing. What would be a quick note elsewhere is a short symphony here.  Definitely something to make sure to experience in life. That along with standing out in the storm…right in it.

Just a few days back (on the 9th)………………

It was a perfect time for strange weather…with the Full Pink Moon rising just that night,  and while  in search of undisturbed Chickweed (for my spring batch of ‘ApotheCarey’s All Healing Salve’) to infuse in oil…under a full moon being the best time to begin that two-week process (of course), I came across the early blooms of the Bloodroot (Sanguinaria canadensis). 

april92009-054

Bloodroot’s name comes from the fact that the root exudes a red juice similar to the color of human blood. Other common names are Indian Paint, Tetterwort, Red Puccoon, Red Root, Coon Root, Snakebite, Sweet Slumber. Many native tribes used the juice of the root to decoratively paint their skin for ceremony. A bachelor of the Ponca tribe would use Bloodroot as a love charm by rubbing the root on the palm of his hand, shake hands with the woman he desired to marry, and if the charm was successful, after five or six days she would then be willing to marry him. The juice was also used to dye cloth and baskets. Bloodroot is of the Poppy family and contains Protopine, an alkaloid also found in Opium, thus giving it mild narcotic effects (don’t you remember the wicked witch using Poppies to put Dorothy and co. to “sleep” to delay their arrival at the Emerald Castle?…ahhh, it all makes since now…). Don’t try this at home-you can go so wrong with medicinal herbs, and this herb is in fact listed as poisonous!!!

april92009-053

 Sanguinaria canadensis received its latin name from the word sanguine which means: consisting of or relating to blood. Sanguinarine, the predominate alkaloid which is considered poisonous, can cause slight central nervous system depression and narcosis if taken internally.  However, it has been found to have an incredible list of medicinal properties such as: antimicrobial, anesthetic and anticancer. It is also an expectorant.  It is antispasmodic and is also an emmenagogue (YOU go to herb school and learn what those mean!). This incredible lady plant is not commonly used by herbalists today-likely because of it’s potential toxic side effects. You will however see it  used as an escharotic salve for skin and breast cancers. It is also found in mouthrinses and toothpastes as a  plague deterrent.

april92009-048april92009-049

Where I live, this time of year all you need to do to view this plant in bloom is walk into the woodland forest. She is abundant. You can just feel her power. I dare not harvest for she is a tricky plant to know…I simply admire, respect and keep moving.


Ahhh…check us out…absorbing the Vitamin D…during the strange window of sunny weather before one of the storms…kids?…what kids?

april92009-010